Fitting your own roller garage door is entirely achievable when you follow the same method that we use on garage door installation jobs. These tips draw directly from our
DIY instruction manual so you can translate what you read into a clean, quiet, and weather-tight finish that still satisfies building control. The emphasis is on
roller garage doors, yet the planning stages apply to sectional and up-and-over designs too, including insulated upgrades if you later opt for a premium
insulated garage door. Use this guide as your walk-through from first measurements to the final safety checks.
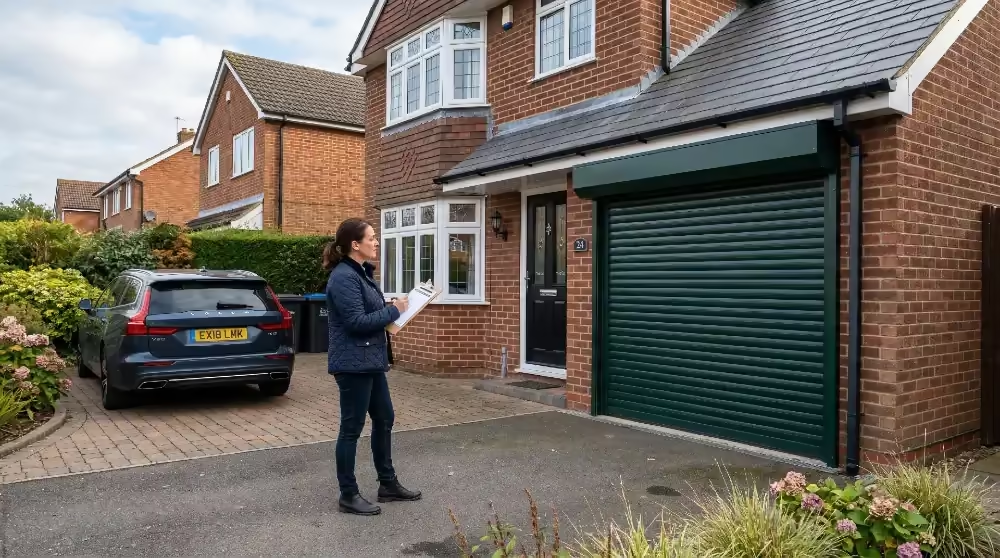
Survey the garage opening like a professional
Remove the old door, sweep the reveals, and work with at least two people because the top box and guides are cumbersome. Measure the opening width in three places, measure the height in three places, and record the smallest figures in millimetres. Check both diagonals to confirm the opening is square; if one diagonal is longer, note where packing will be required so the guides stay parallel. Photograph any pipes, meters, or lamps that may obstruct the guides. Behind-fit TWF55 doors need a minimum of 210 mm of headroom from lintel to ceiling and TWF77 doors need 305 mm; mark those lines level across both reveals so you know exactly where the guide runners will stop and confirm the space suits the DIY roller door specification.
If all this feels a bit too much, simply give us a call (click or tap the top right phone number) and we will walk you through these steps at a pace convenient to you.
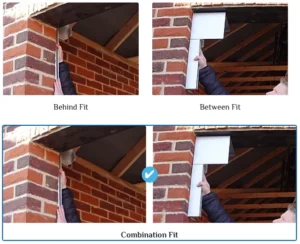
The measuring process differs slightly depending on how you intend to fit the door. For a behind fit (face fix) place a level on the bottom of the lintel and mark a reference line across the brickwork. For a between fit (reveal fix) level a line from the lowest lintel point and transfer it to each reveal so the guides line up squarely under the lintel. Record floor levels too; if the slab slopes, you may need to notch the bottom of the guides or add a threshold to maintain a consistent seal.Don’t forget to inspect the brickwork and lintel integrity. Loose render, crumbling bricks, or rotten timber need repairing before you bolt on the new frame.
Top Tip: Treat bare brick with a suitable seal or primer, and brush away dust before installing guide brackets.
This preparation is the difference between a door that glides quietly and one that rattles or binds after a few weeks.Gather every tool before delivery day
The official kit list is simple but specific: SDS drill, 7 mm masonry bit, 7 mm and 10 mm metal bits, hacksaw or cutting disc, pozi screwdriver, long spirit level, sealant gun, hammer, Stanley knife, tape measure, pencil, and sealer. Add dust sheets, packers, and fixings suited to your wall type. Mark a safe unloading zone for the door kit and keep the protective film in place until you are ready to bolt each part. Planning the workspace now prevents scratches and keeps the curtain pristine when you first roll it into the guides.Lay out your fixings in order of use. The guide runners typically attach with 7 mm bolts that pass through the back of the guides and expand into the wall. The top box fixes through the end plates with longer bolts. For garages with steel columns or RSJs (Rolled Steel Joist, steel beam used in construction to support structure loads), prepare metal drill bits and self-drilling screws rated for steel. Keep silicone, expanding foam, and draught brushes nearby for the sealing stage. Label each bag of fixings so you do not mix lintel bolts with guide bolts mid-install.Finally, plan your lifting team. Even the compact TWF55 barrel is awkward to lift single-handed. Recruit at least one helper; two helpers make a TWF77 barrel lift far safer. Agree on hand signals and lifting positions before you move the barrel. Good communication keeps the curtain straight, prevents scuffs, and protects fingers.
Cut and drill the guide runners with precision
Use your height marks to cut the guides from the bottom so the “F” marking on each runner sits on the correct face against the wall. Place the cut guides where they will live and mark fixing positions about 100 mm from each end with at least one more hole between. Lay the guides flat, drill straight through with a 7 mm bit, then flip them and open only the rear skin with the 10 mm bit. This recessed hole allows your fixings to sit flush, gives more bite, and avoids distorting the runner when you torque the bolts and this is exactly what you want when preparing for a smooth roller door install.When cutting guides for a between fit, clamp both runners together so you remove equal amounts from each. This keeps the “F” orientation consistent and ensures the entry slot lines up with the barrel. After cutting, deburr (smooth the rough edges) the edges with a file so the curtain glides without snagging. Wipe the guides clean and keep them on padded trestles until you are ready to fasten them to the wall.Before drilling the wall, hold each guide in place with temporary props or clamps. Use the drilled holes as a template to mark the masonry, then remove the guide and drill the wall to the correct depth. Brush out dust and add sealant to the fixing holes if the brickwork is porous. When fastening the guide permanently, insert packers behind any hollow spots so the runner cannot bow when tightened.
Lift the barrel and guides together
With two or more people, slide the guide runners into the end plates of the top box while it rests on props. Remove the packaging film, lift the assembly into place, and check both guides for plumb using the spirit level. Mark the fixing holes on the wall, lower the assembly, drill the masonry, and blow out dust before reinstating the runners. Tighten the anchors evenly so the guides stay straight. We provide
garage door installation services in Norfolk and
Suffolk and if DIY installation feels challenging.The instruction manual emphasises keeping the barrel central. Measure from each end plate to the nearest reveal; the dimension should match on both sides. If you are installing between the reveals, use temporary timber braces to hold the guides exactly 25 mm wider than the curtain. Once secured, double-check the level across the head box and confirm the curtain feed slot is parallel to the floor.
Top Tip: If your garage ceiling is particularly low, we suggest measuring down from the rafters to create a level reference line for the top of the guides. Mark this line on both walls and cut the guides so they align perfectly with the line.
This trick helps when the lintel slopes or when historic brickwork varies from left to right.Feed, secure, and balance the curtain
Remove the transport straps only after the guides are fixed. Carefully feed the curtain down both runners until the bottom slat touches the floor. Manually raise and lower the door to ensure the slats seat correctly and the guides do not pinch. Lock the safety brake, check the anti-drop straps, and confirm the barrel turns evenly before introducing power. If the curtain hesitates, return it to the closed position, realign the guides, and verify that the bottom edges of each runner are square to the floor.As you feed the curtain, watch for debris in the guides. Even a stray screw can scratch the paint. Keep a soft cloth handy to wipe the slats as they enter the runners.
Top Tip: If the curtain rides higher on one side, loosen the guide bolts slightly, adjust the guide until the curtain sits level, and retighten while the door remains partially closed.
This gentle fine-tuning mirrors the process our engineers follow during commissioning.Once the curtain moves freely, fit the rubber stop blocks to the top slat if supplied, and install any locking bars or auto-locks. Please note that the auto-lock latches must sit flush with the entry slot to prevent rattling. Test the manual lock before using the motor so you know it slides smoothly.
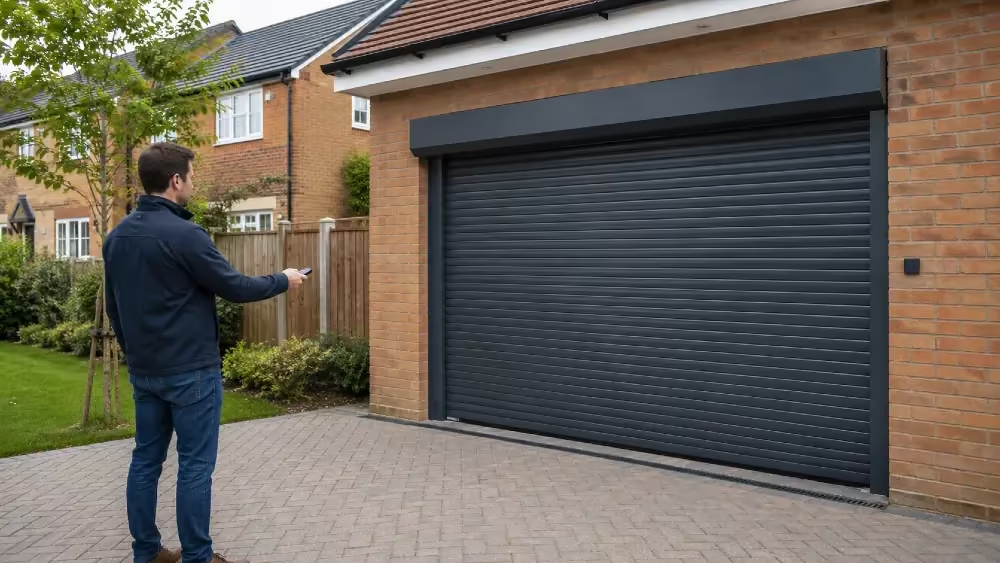
Plan electrics and controls early
All
electric roller doors need a permanent, fused spur. Decide on its location before installation so the cable exit from the motor can reach the spur without strain. If you prefer a plug, book an electrician to install a socket at the correct height. If you want upgraded controls, consider getting the
Teleco control panel with two controls as they are secure (the rolling codes protect against cloning).
Important Note: Always test the manual override after wiring the motor; it is the only way to guarantee access during a power cut.While wiring, fix the control box at eye level on a solid surface inside the garage. Route cables neatly along the wall using trunking or clips. The instructions recommend avoiding tight bends near the motor to protect internal wiring. Once powered, pair the remotes, set the lower and upper travel limits, and run an auto-learn cycle if your controller supports it.
Important Safety Note: Record the location of the manual override pole so every family member can reach it in an emergency.Integrate safety edges or photocells according to the manual. Mount photocells at 150 mm from the floor to detect obstacles early. If using a safety edge, check that the signal cable (or wireless transmitter) is securely fixed to the bottom slat and protected against abrasion. Test the safety device twice and log the results with the installation paperwork.
Seal, set travel limits, and check safety features
Apply exterior-grade sealant along the full length of each guide and at the top box where rain might track inside. Power up the motor, set the upper limit so the curtain clears the opening without exposing the last slat, and set the lower limit so the bottom rubber compresses evenly. Test the safety edge or photocell twice and document the results.
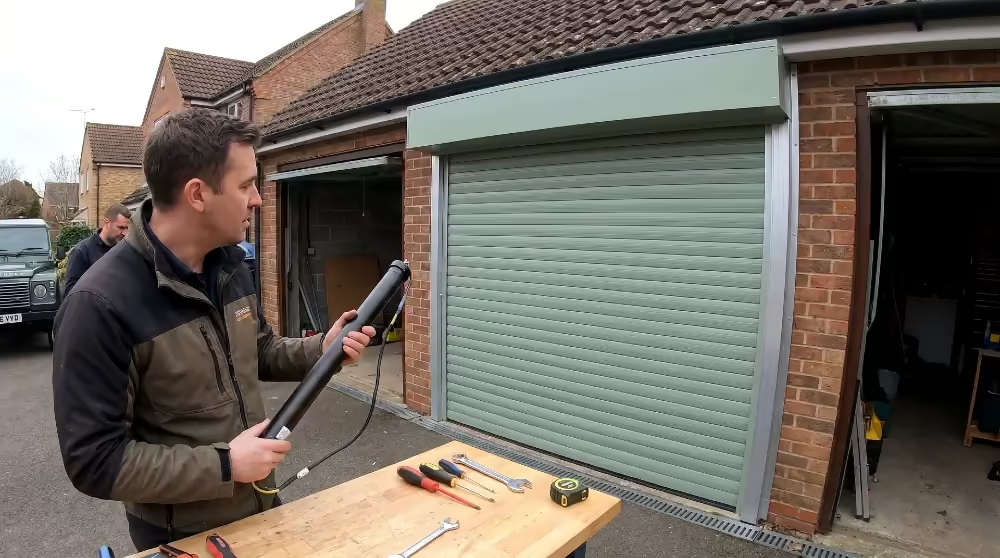
Follow this step-by-step video below if you get stuck.
The manual advises checking the bottom seal for light ingress (unwanted entry of water, such as rain from the outside into the garage) by standing outside at night with a torch inside the garage. Any visible light indicates the seal is not sitting evenly. Adjust the lower limit in small increments until the seal contacts the floor fully without stalling the motor. Re-seal any joints where brick meets guide to keep draughts out.Before finishing, inspect the curtain for uniform gaps. The distance between the curtain and the brickwork should match on both sides from top to bottom. Tighten any loose bolts, trim excess sealant, and clean fingerprints off the slats. A spotless finish reinforces the quality of the DIY job.
Garage Door Remotes
We offer the following remote controls with control panels for the following:
If you already have the control panels and would like spare remote controls instead:
Schedule ongoing maintenance from day one
Write down the installation date and set quarterly reminders. Tasks include rinsing the slats, wiping the rubber seals, lubricating moving metal-to-metal points with a dry spray, and checking that fixings have not loosened. In coastal areas, rinse salt from guides and barrel covers weekly, especially around Norwich where sea spray travels inland.
Safety Checks: Every six months, test the safety reversal by placing a sturdy block on the floor and closing the door. It should stop and reverse within two seconds of contacting the block. Inspect the manual override cable to ensure it has not frayed, especially if it exits through the wall. Once a year, check the balance by disconnecting the motor and lifting the door manually; it should stay at mid-height without drifting, confirming the springs and barrel tension remain correct.If you store vehicles or valuables inside, consider fitting additional security, such as ground anchors or an alarm sensor. Tie these upgrades into your maintenance plan so the entire system stays in sync.
Troubleshooting common DIY issues
If the door stops partway, we suggest first checking for obstructions inside the guides. Next, inspect the safety edge and photocell alignment. For uneven rolling, verify that both guides are bolted tight against solid masonry; packing may have slipped if the wall is uneven. If the motor hums but the door does not move, check the manual override is fully re-engaged. When remotes fail, re-sync them following the control board instructions and replace batteries as needed.Persistent draughts typically mean the floor is uneven. Install a PVC threshold kit or build up the low spot with self-levelling compound. For excessive noise, lubricate guide inserts and check that stop blocks are firmly seated. Document each fix so you have a reference the next time a similar issue appears.
Top Tip: Send a WhatsApp message to yourself when documenting a fix or any observation (check YouTube on how to do it) and start with something like “garage door notes”, that way not only is it dated but when search for it in the future using “garage door” this note will show up.
Dispose of the old door responsibly
Once the new door is running smoothly, dismantle the old leaf, springs, and tracks carefully. Bag smaller components, tie up cables, and store everything away from walkways so nobody trips. Use licensed waste carriers or scrap merchants for steel doors. For more information check out our
garage door disposal guide that explains UK legal requirements.
Important Safety Note:
If the previous door contained asbestos panels (common in older UK garages), follow the guidance from your local council and never cut or drill the material. Asbestos must be removed by specialists; factor this into your project timeline. Wooden doors can often be recycled or repurposed for projects such as raised beds or shed cladding once nails and hardware are removed.
Know when to call for backup
If the opening is massively out of square, the lintel is cracked, or you cannot achieve the minimum headroom, it is smarter to pause and call in a specialist. Contact us if you are in Norfolk or Suffolk as our professional
garage door installers can finish stubborn fits, complete final commissioning, or simply double-check a DIY job before you begin the DIY installation process.The same applies if unexpected structural issues arise. Rotten timber lintels, spalling brickwork, or hidden cables deserve expert attention. Having the confidence to stop and ask for help keeps the installation safe and ensures the warranty remains valid.
Bring the guidance together
A successful installation is ultimately about patience and accuracy. Measure twice, drill once, handle the curtain with care, and record every adjustment (remember the WhatsApp tip!). The more detail you log now, the easier it is to service the door years down the line. When the last fixings are tightened and the new shutter glides silently, you will appreciate the effort invested in following a disciplined process.Use the checklists from the manual to confirm you have completed every stage: measurements, cutting, drilling, fixing, feeding the curtain, wiring, sealing, and testing. Store the paperwork with photos of the final setup. These records help when ordering spares, requesting support, or planning future upgrades, such as converting to an
insulated roller once the budget allows.
 The measuring process differs slightly depending on how you intend to fit the door. For a behind fit (face fix) place a level on the bottom of the lintel and mark a reference line across the brickwork. For a between fit (reveal fix) level a line from the lowest lintel point and transfer it to each reveal so the guides line up squarely under the lintel. Record floor levels too; if the slab slopes, you may need to notch the bottom of the guides or add a threshold to maintain a consistent seal.Don’t forget to inspect the brickwork and lintel integrity. Loose render, crumbling bricks, or rotten timber need repairing before you bolt on the new frame. Top Tip: Treat bare brick with a suitable seal or primer, and brush away dust before installing guide brackets. This preparation is the difference between a door that glides quietly and one that rattles or binds after a few weeks.